Liferay
Here is the easy step-by-step guide to changing the Liferay version from GA1 to SP3. Follow these clear as crystal steps to change the version.
Step-1: Keep the backup of the previous Liferay DXP bundle and backup the old database file.
Step-2: Create a new database and import the database file which you have updated.
Step-3: Download Liferay bundle sp3-version.
Step-4: Replace the data folder with the old data folder.
Step-5: Start the server.
Step-6: Install Fix Pack and Hotfix
Step-1:
Step-2: Keep the backup of your existing environment before installing the fix.
Step-3: Stop the application server.
Step-4: Open the terminal and navigate to the [LIFERAY_HOME/patching-tool] folder.
Step-5: If any patches are available then run the command "./patching-tool.sh revert" to uninstall all the previous patches. Make sure that the previous patch has been uninstalled successfully.
Step-6: Now completely remove the [LIFERAY_HOME/patching-tool] folder.
Step-7: Unzip the Liferay DXP Patching Tool 3.0.32 file at [LIFERAY_HOME] where data, deploy folders are present. Also, make sure after unzipping we take the inner folder which is “patching-tool”
Step-8: Open the Command Prompt from the [Liferay_Home/patching-tool] folder.
Step-9: Now run the command "./patching-tool.sh auto-discovery"
Step-10: After then Place Liferay-hotfix-4494-7310.zip into the ${LIFERAY_HOME}/patching- tool/patches directory.
Step-11: Now run the command "./patching-tool.sh info" to make sure that the hotfix and fix pack are within that folder.
Step-12: Now run the command "./patching-tool.sh install" to install the hotfix and fix pack.
Step-13: Now run the command "./patching-tool.sh info" again to make sure that the patch has been applied successfully.
Step-14: Clean up the cache folders within DXP’s [LIFERAY_HOME]:
Step-15: Finally, now Start the application server.
Step-7: Upgrade Database Steps
Step-1: Take the new Liferay 7.2 instance.
Step-2: Copy Data File in an instance.
Step-3: Create file "com.liferay.portal.search.configuration.IndexStatusManagerConfiguration.config" at [Liferay Home]/osgi/config]
Step-4: Go to [Liferay Home]/tools/portal-tools-db-upgrade-client]
Step-5: run command “ ./db_upgrade.sh”
Step-6: Enter required details (Change if want)
Step-7: Restart the application server.
Step-8: Replace Liferay Portal-setup-wizard.properties.
Step-9: Replace Liferay portal-ext.properties.
Step-10: add all jar file and license key in osgi/modules folder.
Step-11: add war file osgi/war folder.
Troubleshooting steps:
Here you complete the version change from ga1 to sp3. Follow these steps to install and download the files hassle-free.
#CTA-1#
Liferay
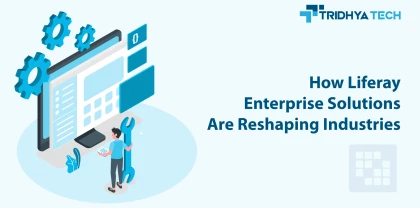
Discover how Liferay Enterprise Solutions are revolutionizing various industries with their versatile and innovative features. This blog explores the transformative impact of Liferay's solutions, showcasing how they are reshaping businesses and driving digital innovation across diverse sectors.

Liferay
Liferay Enterprise Solutions enable businesses to digitally transform in a streamlined manner. The flexible and customizable Liferay platform makes it easy for companies to build omnichannel customer experiences, employee portals, and other digital solutions.


 AHMEDABAD, INDIA
 401, One World West, Nr. Ambli T-Junction 200, S P Ring Road, Bopal, Ahmedabad, Gujarat 380058

Kemp House 160 City Road, London, United Kingdom EC1V 2NX
 GERMANY
 Nürnberger Str. 46 90579 Langenzenn Deutschland
 AUSTRALIA
 Level 36 Riparian Plaza, 71 Eagle Street, Brisbane, QLD 4000
 USA
USA 4411 Suwanee Dam road, Bld. 300 Ste. 350 Suwanee GA, 30024
 SOUTH AFRICA
 Cube Work Space, 24 Hans Strijdom Avenue, Cape Town
 DUBAI, UAE
 B 503 Sama Tower, Sheikh Zayed Road, United Arab Emirates
 CANADA
 34 Applegrove Ct. Brampton ON L6R 2Y8
Tridhya Tech is a full-service software development company focused on delivering solutions for Web & Mobile Applications, AI & IoT to clients globally. We believe in technological empowerment and provide end-to-end tech solutions to build an effective digital presence.